Mineral Wool vs Fiberglass Insulation: Which Option Is Better for Your Home?
Quick answer: In the mineral wool vs fiberglass insulation debate, mineral wool usually wins on fire resistance, moisture handling, sound…


If you have ever walked into a room in the middle of winter and felt a draft you could not trace, or noticed your energy bills climbing month after month with no clear explanation, you already understand the problem that spray foam insulation solves. Most homes in the United States are under-insulated, and the gaps, cracks, and penetrations in a typical house add up to the equivalent of leaving a window open year-round. That single fact alone drives higher energy bills, uneven temperatures, moisture problems, and indoor air quality issues that many homeowners learn to live with instead of actually fixing.
Spray foam insulation directly addresses this problem by expanding into every gap and crevice to create a continuous, airtight barrier. After years of working with homeowners on insulation projects, we have seen firsthand how the right insulation choice transforms comfort, reduces energy waste, and protects a home from moisture damage. This guide covers everything you need to know about residential spray foam insulation, from how it works at a chemical level to which type fits your home, what the installation process looks like, and what safety precautions matter. By the end, you will have a solid understanding of whether spray foam is the right solution for your home and how to move forward with confidence.
Spray polyurethane foam (SPF) is a spray-applied cellular plastic created by mixing two liquid chemicals that react on contact. As the Spray Polyurethane Foam Alliance explains, those chemicals expand rapidly to form foam that insulates, air seals, and acts as a moisture barrier all at once. The two liquids, commonly called the “A” side and “B” side, are kept separate until they meet at the spray nozzle. The “A” side contains isocyanates, while the “B” side is a blend of polyols, catalysts, blowing agents, flame retardants, and surfactants. When combined, they react within seconds and expand up to 30 to 60 times their original liquid volume.
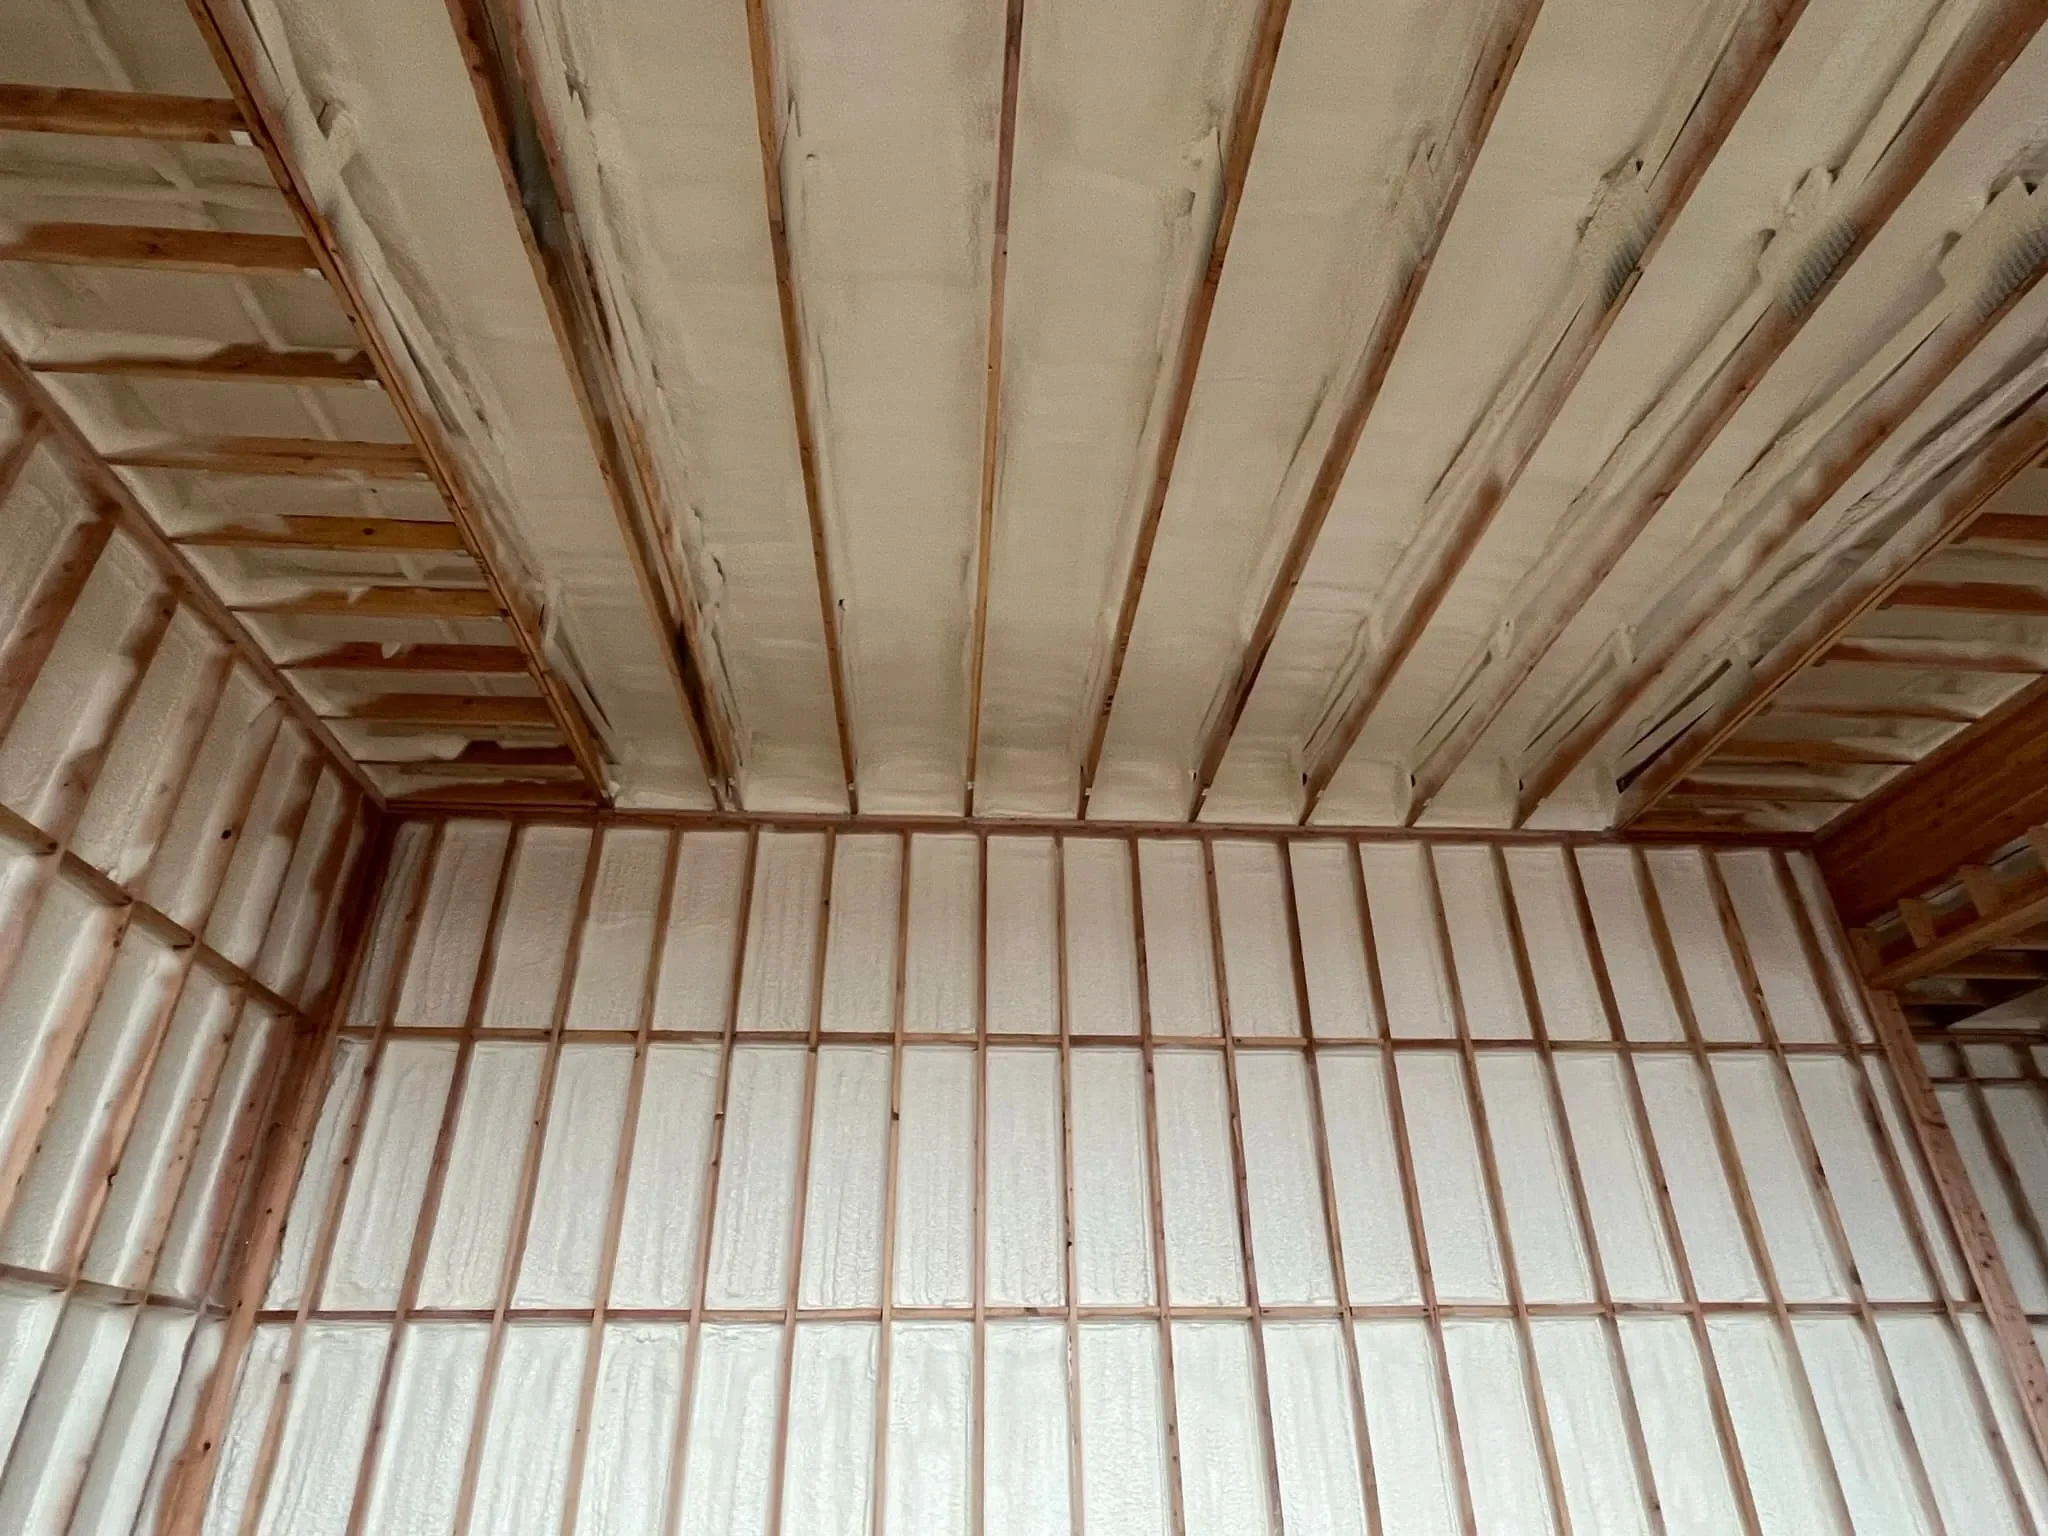
This expansion is what sets spray foam apart from every other insulation material. Fiberglass batts, blown-in cellulose, and mineral wool all sit in wall cavities or attic floors, but they do not actively seal the spaces around them. Spray foam, on the other hand, conforms to the exact shape of the area being treated. It wraps around pipes, fills around electrical boxes, and pushes into the tiniest cracks that you might not even know exist. Once cured, it becomes a rigid or semi-rigid solid that stays in place permanently.
The result is a continuous building envelope, which Building Science Corporation describes as the key advantage of spray foam over other systems. Spray foam provides continuity across the water control, air control, vapor control, and thermal control layers that a house needs to separate the indoors from the outdoors. No other single insulation material does all four at once.
All residential spray foam falls into one of two categories: open-cell and closed-cell. Understanding the differences between them is essential for choosing the right product for your specific project.
Open-cell spray foam is a low-density, semi-rigid foam with tiny cells that are not completely closed. Air fills the open spaces within the material, giving it a softer, sponge-like texture. It expands significantly during application, which means it fills cavities thoroughly with relatively little material. Open-cell foam typically delivers an R-value of about 3.5 per inch, which is comparable to fiberglass batts but with far superior air sealing.
Closed-cell spray foam is a medium-density, rigid foam where the cells are completely closed and filled with a gas that boosts thermal resistance. It has a higher R-value of around 6.0 to 7.0 per inch, making it roughly twice as effective per inch as open-cell. Closed-cell foam also acts as a vapor barrier and adds structural rigidity to the assemblies it is applied to. Because of its density, it expands less during application than open-cell foam.
| Property | Open-Cell Spray Foam | Closed-Cell Spray Foam |
|---|---|---|
| R-value per inch | ~3.5 | ~6.0 to 7.0 |
| Density | 0.4 to 1.2 lbs./ft³ | 1.75 to 2.25 lbs./ft³ |
| Air barrier | Yes (at full wall thickness) | Yes |
| Vapor barrier | No | Yes (at approximately 1.5 inches) |
| Water resistance | Absorbs water, not for direct contact | Resists water penetration |
| Sound absorption | Very good | Good |
| Structural reinforcement | Minimal | Adds wall and ceiling rigidity |
| Typical applications | Walls, attics, sound deadening | Foundations, crawl spaces, exterior sheathing, cold climates |
Expert Tip: If you live in a cold climate (IECC Climate Zone 5 or higher), closed-cell foam is generally the better choice for walls and roof assemblies because it provides condensation control and qualifies as a Class II vapor retarder at 1.5 inches of thickness. In milder climates, open-cell is often more cost-effective for interior cavities and attic floors.
Key Takeaways
Spray foam is versatile enough to be used in virtually every part of a residential building envelope. The right application depends on the area being insulated, the climate zone, and whether the home is new construction or a retrofit.
Attics are one of the most common locations for spray foam, and the approach depends on whether the attic is vented or unvented.
In an unvented conditioned attic, spray foam is applied directly to the underside of the roof deck. This approach brings the attic inside the conditioned space, which is especially valuable when HVAC equipment and ductwork are located there. According to Building Science Corporation’s residential spray foam guide, both open-cell and closed-cell foam work in most climates for this application, but in IECC Climate Zones 5 and higher, only closed-cell foam should be used.
A vented unconditioned attic can still benefit from spray foam. In this setup, closed-cell foam is used to seal the ceiling plane, creating an airtight “bathtub” that is then filled with fiberglass or cellulose insulation. This prevents air from leaking through penetrations like recessed lights, plumbing vents, and electrical wires.
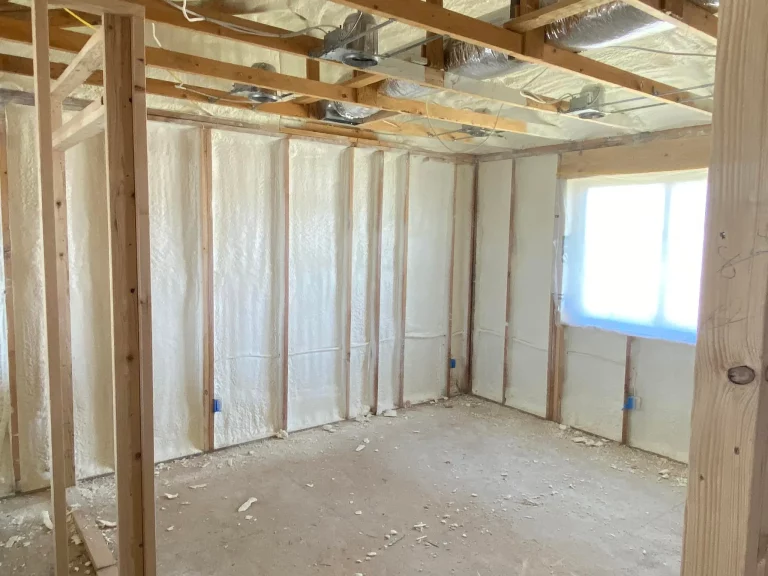
In wood-framed walls, spray foam can fill the cavity between studs. Both open-cell and closed-cell products work, and as long as the foam is sprayed to the minimum depth classified as air-impermeable, it does not need to fill the entire cavity to be effective. Hybrid wall assemblies are also common, where a thin layer of closed-cell foam is applied against the sheathing and the remaining cavity is filled with fiberglass or cellulose.
For crawl spaces, spray foam is applied to the rim joist and floor framing above. In vented crawl spaces, only closed-cell foam should be used across all climate zones because it keeps moisture from reaching the wood framing. In conditioned (unvented) crawl spaces, the space is treated like a mini-basement and connected to the rest of the house.
Basement foundation walls can be insulated on the interior with spray foam applied directly to the concrete. In climate zones 5 and higher, closed-cell foam is recommended for basements. Open-cell foam should never be used under basement floor slabs.
The rim joist area, where the floor framing meets the foundation wall, is one of the leakiest parts of any home. Spray foam is exceptionally effective here because it seals the irregular shapes, gaps, and penetrations that are difficult to address with rigid foam boards or fiberglass.
Expert Tip: The rim joist is often the single best place to start with spray foam in an existing home. It is accessible from the basement, relatively small in total area, and sealing it eliminates one of the largest sources of air infiltration in the building envelope.
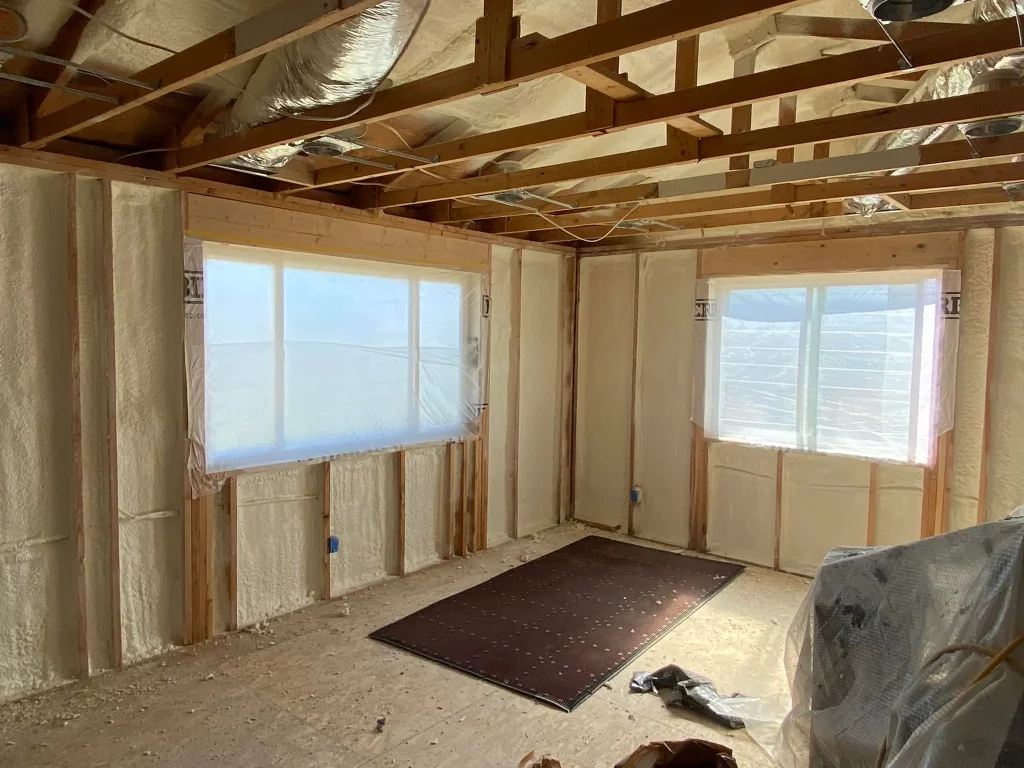
The primary reason most homeowners consider spray foam is energy savings. The EPA, through its ENERGY STAR program, estimates that homeowners can save an average of 15% on heating and cooling costs by air sealing their homes and adding insulation. Spray foam does both simultaneously, and because it creates a continuous seal, the actual savings can exceed this average in homes with significant air leakage.
Spray foam improves energy performance in two ways. First, its R-value per inch reduces conductive heat transfer. Second, and arguably more important, it eliminates air infiltration. In a typical home, air leakage accounts for 25 to 40 percent of the energy used for heating and cooling. When you seal those leaks with spray foam, customer reviews can provide useful insight into how previous insulation projects were handled and the overall service experience. The HVAC system does not have to work as hard to maintain comfortable temperatures.
The U.S. residential spray foam insulation market was valued at approximately $750 million in 2024, reflecting the growing recognition among homeowners and builders that spray foam delivers superior performance in air sealing and energy efficiency. The residential segment holds the largest share of this market.
Moisture is one of the most destructive forces in any home. When warm, humid air moves through wall cavities and meets cooler surfaces, condensation forms. Over time, that moisture leads to mold growth, wood rot, and structural damage.
Closed-cell spray foam acts as a vapor barrier when applied at sufficient thickness, preventing moisture from passing through the building envelope. Open-cell foam allows vapor to pass through more easily, which can be beneficial in some assemblies where the wall needs to dry in one direction. Both types stop the air movement that carries moisture into cavities in the first place.
When spray foam seals the building envelope, it keeps out more than just outside air. Pollen, dust, allergens, and pollutants that would otherwise enter through cracks and gaps are blocked. This is particularly beneficial for family members with allergies or asthma. However, because spray foam creates such a tight seal, proper mechanical ventilation becomes important to ensure fresh air circulates throughout the home.
Spray foam reduces sound transmission through walls, floors, and ceilings. Open-cell foam in particular absorbs sound very well because of its open-cell structure, which allows sound waves to enter the material and dissipate. This makes it a popular choice for interior walls between bedrooms, home theaters, and plumbing partitions.
Closed-cell spray foam adds rigidity to wall and ceiling assemblies. When applied between studs or rafters, the foam bonds to the framing and sheathing, creating a composite structure that is stiffer and more resistant to wind loads. In areas prone to high winds, this added structural benefit is a meaningful advantage over other insulation types.
Key Takeaways
R-value measures how well a material resists heat flow. The higher the R-value, the better the insulation performance. The Department of Energy provides minimum R-value requirements by climate zone based on the 2021 International Energy Conservation Code (IECC). These requirements dictate how much insulation your home needs in specific locations.
One of the advantages of spray foam is its high R-value per inch compared to most alternatives. In walls with 2×4 framing, cavity space is limited to about 3.5 inches. Open-cell foam at 3.5 inches yields roughly R-12.5, while closed-cell at the same thickness delivers R-21 to R-24.5. This means closed-cell foam alone can meet or exceed code requirements in many climate zones without needing to add continuous exterior insulation.
For attics, the required R-values are much higher because heat rises and attics experience extreme temperature swings. In climate zones 4 through 8, the minimum ceiling R-value is R-60. Spray foam applied to the underside of the roof deck in an unvented attic can meet this requirement with a combination of closed-cell and open-cell layers, a hybrid approach that Building Science Corporation details in their residential guide.
Expert Tip: When comparing insulation options, do not just look at R-value per inch. Consider the total assembly performance. Spray foam’s air sealing eliminates the convective loops and air infiltration that reduce the effective R-value of other insulation types by 30 to 50 percent in real-world conditions.
Understanding what happens during a spray foam installation helps you prepare your home and know what to expect. The process is straightforward when handled by trained professionals, but it requires precision at every step.
Before our crew arrives, the area to be insulated needs to be cleared of obstructions. In an attic, that means removing stored items and ensuring the space is accessible. For wall applications, electrical outlets may need to be removed and wiring protected. Plumbing and HVAC components should be identified and protected.
The installation team will review the scope of work, confirm the foam type and thickness specified for your climate zone and application, and verify that weather conditions are suitable. Temperature and humidity affect how spray foam cures, and most manufacturers specify a minimum substrate temperature for proper adhesion.
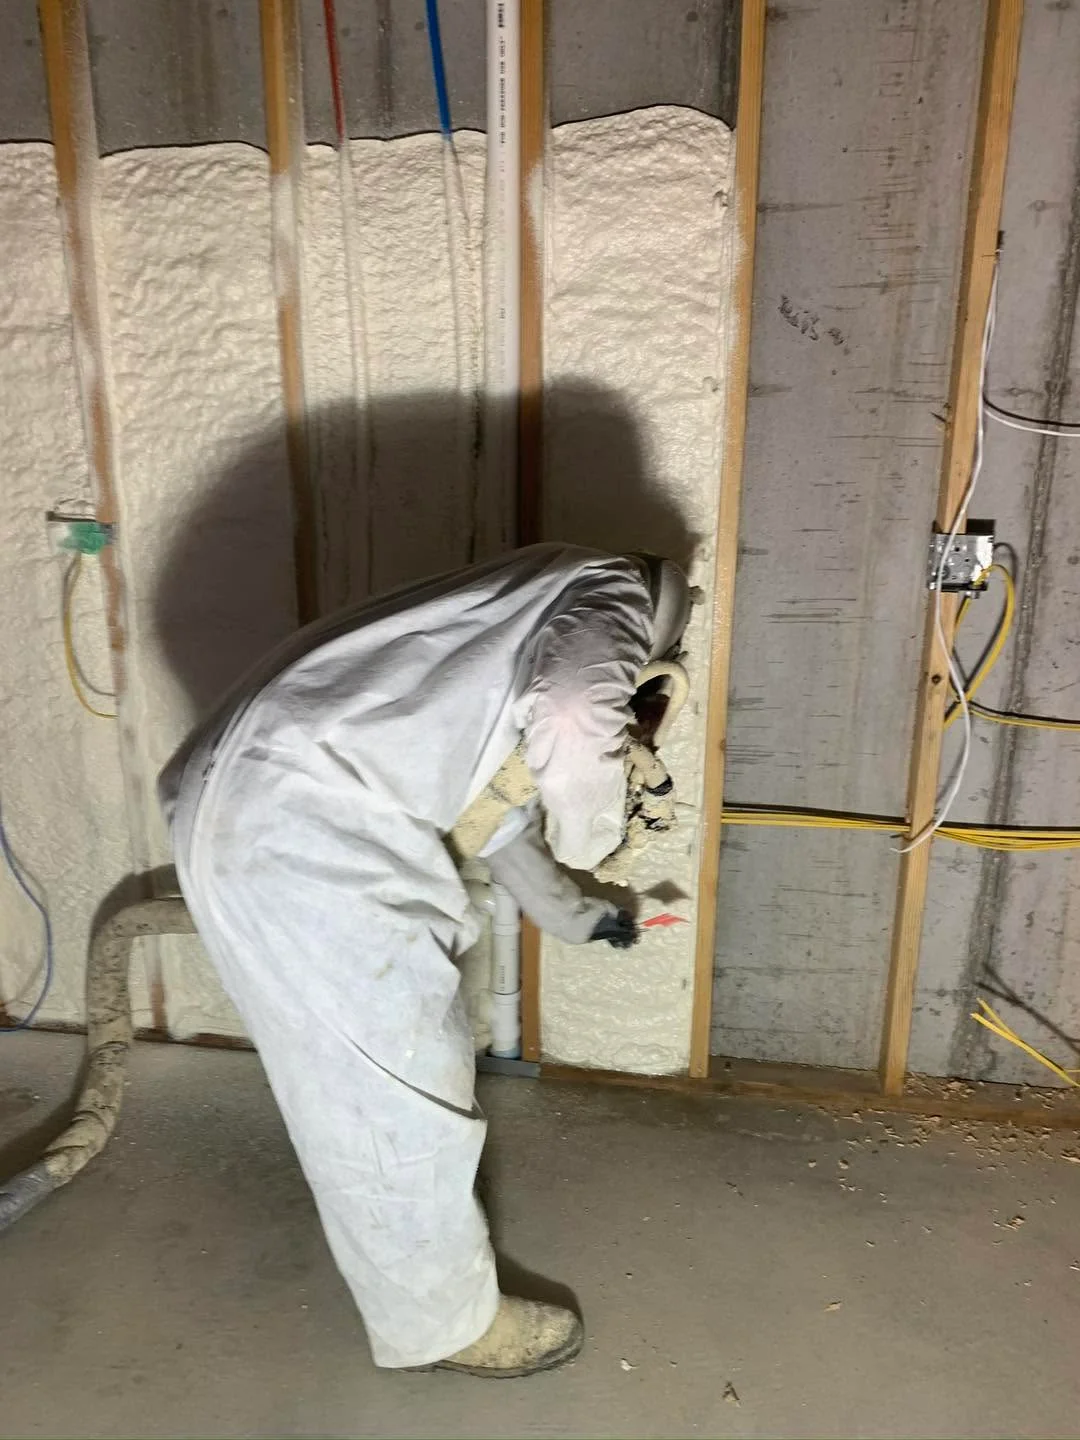
Professional installation uses high-pressure spray equipment. The two chemical components are heated and pumped through hoses to a spray gun where they mix and are applied to the target surface. The applicator wears full personal protective equipment, including a respirator, chemical-resistant gloves, and protective clothing.
The work area is isolated from the rest of the home using polyethylene sheeting and ventilation equipment to prevent overspray and chemical vapors from entering occupied spaces. The EPA recommends that building occupants vacate the premises during installation and that the work area be properly ventilated throughout the process.
The foam is applied in passes, with each layer expanding and curing before the next is added. This ensures consistent density and proper adhesion. The applicator monitors thickness regularly to confirm the foam meets the specified R-value and coverage requirements.
After spraying is complete, the foam continues to cure and off-gas. The U.S. Consumer Product Safety Commission advises homeowners to vacate the premises for at least 24 hours following installation. Re-occupancy time can vary based on the type of foam, the application thickness, building conditions, and whether sensitive individuals such as children, elderly residents, or people with respiratory conditions are present.
Once the foam is fully cured, it is chemically inert and does not release vapors. Excess foam is trimmed flush with the framing, and any exposed surfaces may be covered with a thermal barrier such as drywall or intumescent paint, depending on building code requirements.
Expert Tip: Do not schedule spray foam installation on the same day as other trades that need access to the space. Plan for the curing and re-occupancy period, and coordinate with your contractor so everyone is clear on the timeline before work begins.
Safety is one of the most important topics to understand when considering spray foam, and it is also one of the most misunderstood. When installed correctly by trained professionals, cured spray foam is safe and inert. The risks come during the installation and curing process, when the chemicals are reactive and release vapors.
The isocyanates in the “A” side of spray foam are the primary concern during application. They can cause respiratory irritation, skin sensitivity, and eye discomfort in unprotected individuals. This is why the EPA requires that only trained applicators wearing appropriate personal protective equipment be present in the work area during spraying. No homeowner, pet, or other trade worker should be in the building while high-pressure spray foam is being applied.
After spraying stops, the foam continues to emit volatile organic compounds (VOCs) as it cures. Most of the off-gassing occurs within the first 24 hours, though it can continue for 72 hours or longer depending on conditions. The EPA and CPSC both recommend that homeowners discuss re-occupancy timelines with their contractor before the job begins and plan to stay elsewhere during and after installation for at least 24 hours.
If you continue to smell chemical odors or experience respiratory symptoms after returning home, the CPSC recommends seeking medical attention, contacting your contractor, and considering an independent indoor air quality assessment.
Proper installation is the single most important factor in both the performance and safety of spray foam insulation. The EPA advises homeowners to verify their contractor’s training, insurance, licenses, and references before hiring them. Look for installers who have completed certification programs and who follow established safety protocols.
A qualified installer will:
Expert Tip: If a contractor tells you that you can stay in the home during a high-pressure spray foam installation, that is a red flag. Professional installers following safety protocols will always require the home to be vacated during application.
After seeing hundreds of spray foam projects, we have noticed a few recurring mistakes that homeowners and less experienced installers make.
Using open-cell foam in a location that requires closed-cell is one of the most common errors. Open-cell foam should never be used below grade, in direct contact with water, or under basement floor slabs. In climate zones 5 and higher, only closed-cell foam should be used on basement walls and roof decks for unvented attics.
In a vented attic, spray foam is often used just to seal the ceiling plane before filling with fiberglass or cellulose. If the sealing step is incomplete, leaving even small gaps around penetrations, air will continue to leak through, undermining the performance of the insulation above it.
When you seal a home tightly with spray foam, mechanical ventilation becomes necessary to maintain indoor air quality. This is not a downside of spray foam; it is a design consideration that needs to be addressed. A balanced ventilation system that supplies fresh air while exhausting stale air should be part of the overall insulation plan.
Spray foam installations must comply with the International Residential Code and local building codes. This includes requirements for ignition barriers or thermal barriers over exposed foam, minimum thickness for vapor control classification, and specific R-values for each climate zone. Working with a knowledgeable contractor ensures these requirements are met.
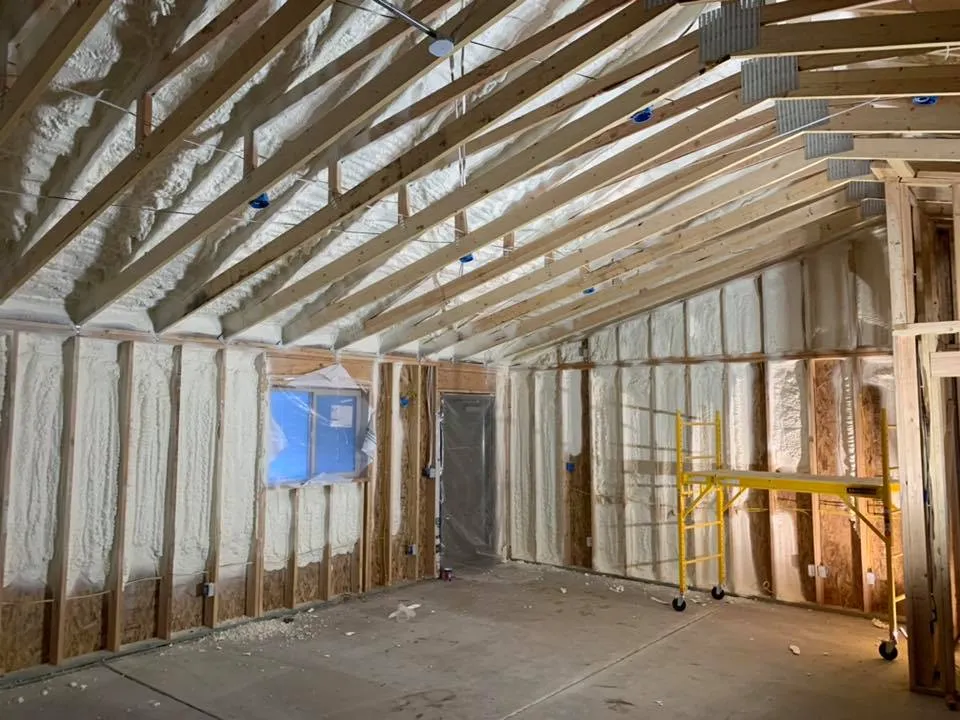
Understanding how spray foam stacks up against alternatives helps you make an informed decision for your home.
| Feature | Spray Foam | Fiberglass Batts | Blown-In Cellulose | Rigid Foam Board |
|---|---|---|---|---|
| Air sealing | Excellent | Poor | Fair | Good (if taped and sealed) |
| R-value per inch | 3.5 to 7.0 | 2.9 to 3.8 | 3.1 to 3.8 | 3.8 to 6.5 |
| Moisture barrier | Closed-cell only | None | None | Varies by type |
| Fits irregular spaces | Expands to fill | Requires cutting | Fills settled | Must be cut and fitted |
| Sound dampening | Very good | Fair | Good | Fair |
| DIY friendly | No (professional only) | Yes | Yes | Moderate |
| Lifespan | 80+ years | 15 to 20 years (can settle) | 20 to 30 years | 50+ years |
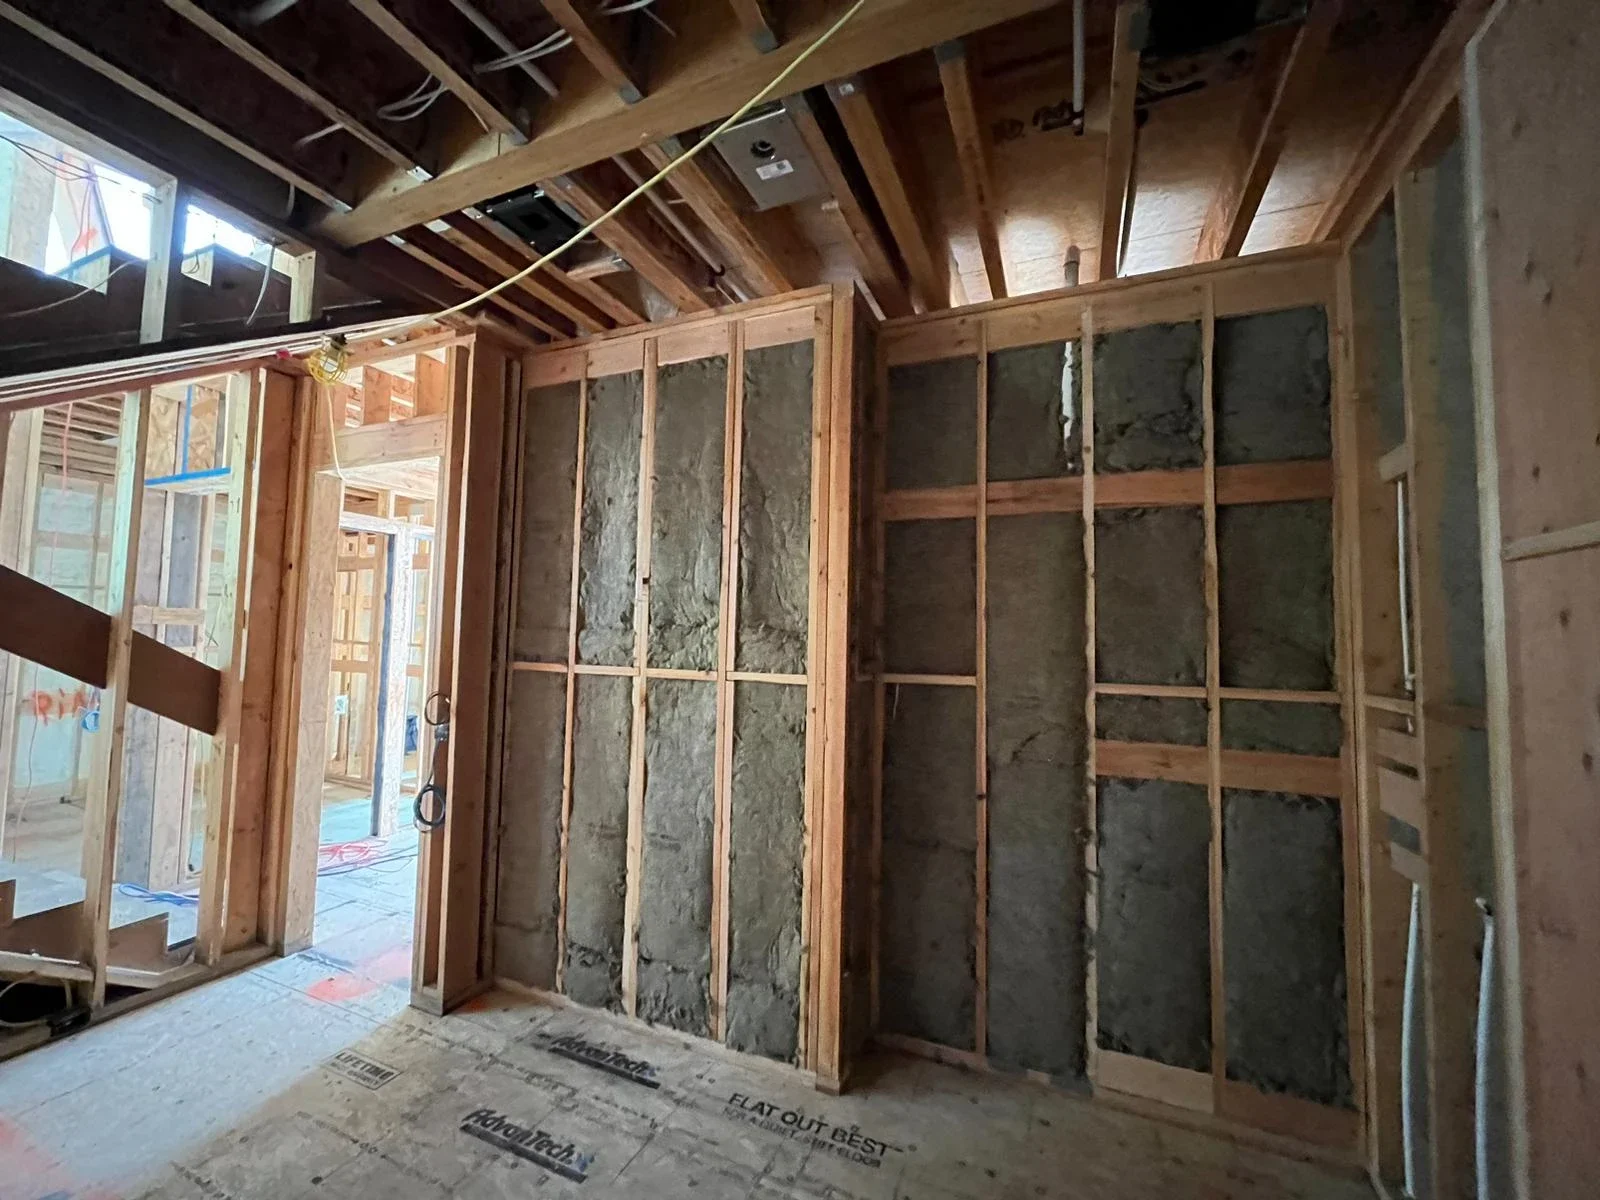
Each insulation type has its place. Fiberglass batts are inexpensive and easy to install in accessible wall cavities. Cellulose is a good option for existing attic floors. Rigid foam board works well for continuous exterior insulation. But when the goal is maximum air sealing combined with high thermal resistance in a single step, spray foam is the most effective option available.
Spray foam is not always the right answer for every home or every budget. Here is a quick guide to help you assess whether it is a good fit for your situation.
Spray foam is a strong choice when:
You might consider alternatives when:
When properly installed, spray foam insulation lasts the lifetime of the building. It does not settle, sag, or degrade over time like fiberglass or cellulose can. The foam remains chemically stable and maintains its R-value and air sealing properties for decades.
Yes. Once spray foam has fully cured, it is chemically inert and does not release vapors or off-gas. The CPSC notes that the materials are only hazardous during application and become completely safe once cured. Proper curing time, typically 24 hours or more, is essential before re-entering the home.
Absolutely. Retrofitting spray foam into existing homes is one of the most common applications. The most accessible and impactful locations in existing homes are the attic, rim joists, and crawl spaces. Wall cavities can also be done, though it requires more invasive work.
Yes, spray foam reduces sound transmission. Open-cell foam in particular absorbs sound very well because its open structure allows sound waves to enter and dissipate within the material. It is commonly used in interior walls, floor assemblies, and around plumbing to reduce noise transfer.
In most cases, yes. Spray foam creates a tight building envelope, which means less natural air exchange. The Building Science Corporation recommends providing mechanical air exchange through balanced ventilation systems, especially in unvented conditioned attics. This ensures fresh air circulates, and moisture is removed from the home.
Yes. Ice dams form when warm air leaks from the living space into the attic, warming the roof deck and melting snow that refreezes at the eaves. By sealing the attic floor or the underside of the roof deck with spray foam, you eliminate the warm air leakage that causes ice dams. The ENERGY STAR program notes that sealing air leaks and adding insulation can help lower the chance of ice dams in snowy climates.
Spray foam insulation is one of the most effective ways to improve your home’s energy efficiency, comfort, and durability. It works by doing what no other insulation material can do in a single step: providing thermal resistance, air sealing, moisture control, and even structural support all at once. Whether you are building a new home, upgrading an existing one, or solving specific problems like ice dams, moisture issues, or high energy bills, quality insulation solutions can provide lasting protection and improved performance.
The key decisions you need to make are straightforward. Choose between open-cell and closed-cell based on your climate zone, application area, and performance needs. Hire a qualified installer who follows established safety protocols and communicates clearly about the process. Plan for proper ventilation after sealing your home. And verify that the installation meets local building code requirements.
Use this guide as your reference as you move through the process. Every home is different, and the right insulation strategy depends on your climate, your home’s construction, and your priorities. With the information here, you are equipped to have informed conversations with professionals and make decisions that will benefit your home for decades.
Deciding on the right insulation for your home raises a lot of questions. If you want to talk through your options with an experienced team, we are here to help. Reach out to High Country Solutions at [email protected] or call us at (307) 248-9063. We can walk you through what makes sense for your specific home, climate zone, and budget, and help you take the next step with confidence.